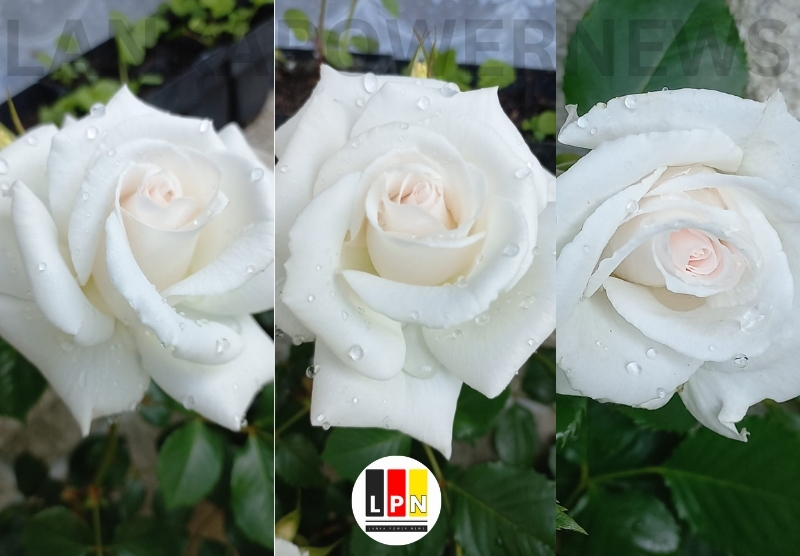
Growing Roses..!
What is Hybridizing Roses?
The simplest way to explain it is this: Hybridizing is the process of cross-pollinating two different rose varieties to produce a seed. This seed, when planted, will grow into a new rose plant that shares characteristics from both parents. What do you think is the best part? Every single seed from that cross is genetically unique, meaning you might plant fifty seeds and get fifty different types of roses.

It’s an adventure in gardening, really. You’re not just planting; you’re experimenting. You are consciously choosing a “mother” rose and a “father” rose, hoping their best traits combine into a superior offspring. Maybe you love the deep red color of one rose but wish it had the strong fragrance of another. Hybridizing allows you to try and make that wish come true!
Did you know that many famous roses, like the classic ‘Peace’ rose, were the result of painstaking hybridizing efforts? These breeders simply had a vision for a perfect bloom and decided to try and create it themselves.
The Crucial First Step: Understanding Rose Anatomy
Before you can start choosing parents, you need to understand the reproductive parts of the flower itself. Roses, like many flowers, contain both male and female parts in the same bloom.
The male parts are the stamens, which are little stalks topped with dusty yellow sacs called anthers. This is where the pollen, the “sperm” of the flower, is produced. The female part is the pistil, which sits in the center of the bloom. At the very tip of the pistil is the stigma, and this is the sticky landing pad for the pollen.
For successful how Hybridizing Roses, your job is to take the pollen from one rose (the “father” or pollen parent) and gently place it onto the stigma of another rose (the “mother” or seed parent). It’s an incredibly delicate transfer, and timing is everything.

Phase One: The Matchmaking—Choosing Your Parents
This is where the fun and strategy begin. When you are deciding which two roses to cross, you need to think about what you are trying to achieve.
Do you want a rose that can withstand colder temperatures? Then choose two cold-hardy parents. Are you dreaming of a rose with a deep blue hue? That’s tougher, as true blue doesn’t naturally exist in roses, but you might cross a mauve rose with a deep purple one to see what you get.
What’s important is that you need to find two healthy, vibrant roses that are in their prime blooming season. Health is a trait that is often passed on, so avoid using any parent that struggles with common diseases like black spot or powdery mildew. A strong start gives your potential new rose the best chance at a strong life.
Think of it like this: You are trying to combine the most desirable traits of Rose A with the most desirable traits of Rose B. Your choice of parents directly influences the potential outcome of your seeds.
Phase Two: How to Pollinate Roses
Once you have your parents selected, the next step is the actual pollination, and this is where you step in for the bees. We need to prepare the mother rose to accept the new pollen and ensure it doesn’t accidentally pollinate itself or get pollinated by a random bee carrying unwanted pollen.
First, you need to select a plump bud on your seed parent the mother that is just about to open. Ideally, you want to get to it before it opens naturally. You’ll need to carefully peel back the petals to expose the stamens and the central stigma.
Now for the delicate, crucial task: Emasculation. Using fine tweezers, you must remove all the male stamens before the anthers have a chance to ripen and release their pollen. This is vital. If you wait too long, the flower might self-pollinate, and your cross will be ruined.
Once emasculated, the flower is ready, but the stigma might not be. You need to wait about a day or two until the stigma tip looks moist and sticky that’s the signal that it is receptive.
In the meantime, you need to collect the pollen from your father rose. You can do this by taking an open flower from the pollen parent, shaking the pollen onto a small piece of paper, or just lightly brushing the anthers with a clean, fine artist’s paintbrush.
When the mother’s stigma is sticky, gently dab your collected pollen onto the stigma using the paintbrush or even a fingertip. That’s it! You have just completed the most important physical step of How to Pollinate Roses. Now you wait.
Phase Three: The Waiting Game and the Seed Hip
After the cross, you must protect your creation. To prevent accidental pollination by insects, you can cover the newly pollinated flower with a small paper bag or a piece of netting tied loosely around the stem. Don’t forget to label the stem with the names of the parents! It’s important to always write down the mother first and the father second, like this: [Mother Rose Name] x [Father Rose Name]. This record-keeping is a cornerstone of how Hybridizing Roses.
If your cross was successful, the base of the flower, called the hypanthium, will begin to swell. This swelling part is called the rose hip, and it’s where the seeds are developing. This process can take three to four months, depending on your climate and the rose variety.
The hip will eventually turn a color like orange, red, or brown, and start to soften. This is your cue that the seeds inside are fully mature and ready to be harvested. You will then carefully cut the hip open, scoop out the seeds, and clean off the surrounding pulp.
Phase Four: Planting the Dream and Stratification
Now you have the seeds, but you can’t just plant them and expect them to grow. Rose seeds have a built-in survival mechanism that prevents them from germinating too early—they need a period of cold, moist conditions to “trick” them into thinking winter has passed. This process is called stratification.
A common way to stratify is to place the seeds in a labeled plastic bag or container with a sterile, moist medium like peat moss or vermiculite. Don’t let it be soaking wet, just damp. Then, you place the container in your refrigerator (not the freezer!) for anywhere from eight to sixteen weeks. The temperature needs to be consistently cool.
What do you think is happening inside that bag? The cold and moisture are breaking down the seed’s hard outer shell and internal growth inhibitors, preparing it for germination.
Once the stratification period is over, you can plant the seeds in small pots filled with a sterile seed-starting mix. Keep the soil warm and moist, and soon, you will hopefully see tiny rose seedlings emerging! These little plants are the result of your how Hybridizing Roses efforts.
How take Care Roses from Seedling to Bloom
A new rose seedling is fragile, and it needs a lot of TLC to make it to its first bloom. This brings us to the broader topic of How take Care Roses, which is essential for these unique new plants.
Start by treating them gently. Keep them in a protected environment with plenty of sunlight, but shield them from harsh, direct afternoon sun until they are a bit bigger.
As the seedlings grow, you’ll need to transplant them into larger pots to give the roots room to develop. When they are about six months old, or large enough to survive outdoors, you can transition them to the garden.
The biggest test for your new rose will be its first winter. Some hybridizers keep their seedlings in pots for a full year to ensure maximum strength before planting them in the ground. Water regularly, especially in dry periods, and feed them with a balanced rose fertilizer to encourage strong growth.
This critical point in how take Care Roses is observation. You must closely watch your new roses for any signs of disease. Since these are brand-new genetic combinations, they might have inherited weaknesses or, hopefully, new strengths against local pests and diseases.
The Big Reveal: Your First Bloom
The excitement peaks when your hybrid starts to set a bud. For most roses, you’ll have to wait about a year to eighteen months from the time you planted the seed to see your very first bloom.
This is the moment of truth. Will it have the color you hoped for? The fragrance you dreamed of? Will it be disease-resistant? Most of the time, the rose will be “meh” perfectly fine, but nothing special. However, sometimes, maybe just once in a hundred seeds, you will see something truly beautiful and unique.
If you find a new rose that is truly exceptional and worth sharing, you have created a Cultivar, a cultivated variety. You can then propagate it that is, clone it by a method like How Grow Roses From Cuttings to ensure that every new plant is genetically identical to your unique creation.
The Connection: Propagating Your New Hybrid
Once you have a winner, you don’t want to rely on the seeds anymore, as seeds will always produce new, unique roses. If you want to share your specific, beautiful hybrid, you need to propagate it through cuttings.
Learning How Grow Roses From Cuttings is simply taking a piece of your new rose’s stem, treating it with a rooting hormone, and encouraging it to grow its own root system. This process creates a genetic duplicate, ensuring that the next generation of your hybrid is exactly the same as the first. This cloning ability is what allows breeders to sell millions of copies of a great new rose variety.
It’s a wonderful realization: you start by playing matchmaker with how Hybridizing Roses, and you finish by becoming a master cloner through How Grow Roses From Cuttings.
A Final Thought on the Rose Journey
The world of roses is incredibly rich, stretching far beyond just choosing a pretty bouquet. It’s a journey of science, patience, and creativity. Whether you’re carefully orchestrating How to Pollinate Roses to create a hybrid or diligently tending to them using your knowledge of How take Care Roses, you are participating in a tradition that is centuries old.
What do you think? Are you ready to pick up your tweezers and start designing the next great rose of the future?


One Comment